In my first official post, I thought it best to guide you through how this blog and site was setup from an idea to legit website.
This blog runs off the following stack:
- AWS (well . . . Route 53 and S3 specifically)
- Terraform
- Hexo
- Hopes and Dreams
AWS Setups
Shockingly (that’s my sarcasm btw . . .) - I already have an AWS account setup already, but I thought it best for this blog to associate a new email account to control this blog.
Side note, this is also best practice, please no one ever use the root/master user other than when necessary.
IAM Setups
- I went to IAM → Groups → Create new group, so that I can track the permissions for this new user’s group
- Name group → Attach Policy - you can create your own policy or attach the standard pre-generated policies. I attached a pre-generated policy and plan to scope it in later, stuck with the PowerUserAccess for now.
- Reviewed and hit complete!
- Then I went back to IAM → Users → Add User
- New Username generated with both programmatic and Console access (things will be mostly programmatic, but will still need Console access from time to time).
- Tags → skipped this for now - tags are super powerful for billing and configuration management, but for this blog, it might not be super necessary to tag our one user right now.
- Complete → Saved the Access Key and Secret Key locally. Definitely going to need those later on during setup, although you can just re-gen those if lost, so no big deal
- Before signing in as the new IAM User; I generated an MFA token as follows:
- Users → Select User
- Security Credentials → Assigned MFA Device → Manage
- Selected Virtual MFA device (you can definitely go for a physical MFA if you have one kicking around…I definitely did not)
- Keyed in two consecutive tokens generated. I tripped up on this one time previously by entering the same token, twice consecutively and it would not add assign the virtual MFA. Felt like a proper idiot for a good hour after I realized the misstep.
- Logged out of the root user and back in with the new account to confirm all was kosher!
Domain Purchase and Registration
After deliberating on a domain name, I then had to purchase thecloudonmymind.com domain - I had the choice between GoDaddy ($14.99 per year), Namecheap ($11.72 per year) and directly through AWS ($12.00 per year). Decided to keep things simple and buy direct through AWS - although buying through another vendor with a promo code is something I highly recommend!
Route 53 Setups
- Route 53 → Registered Domains → Register Domain
- 😅 it was available!
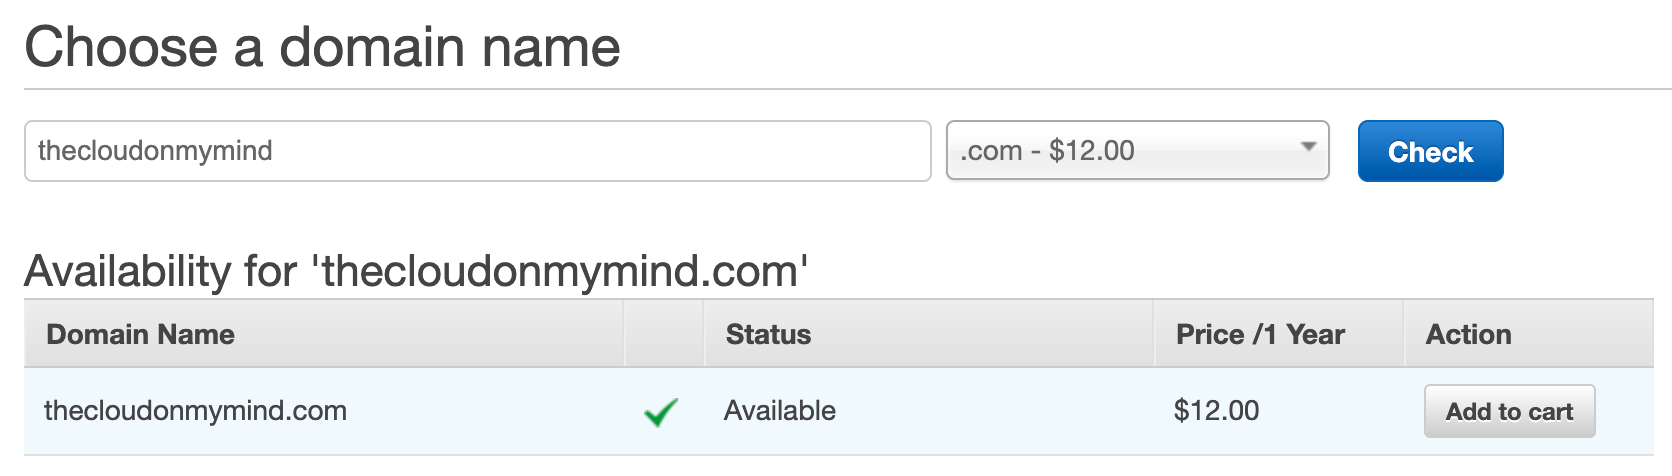
- Decided to register the domain for 1 year - no discount registering for 2+ years or anything, and I am good with reminders on renewals!
Side note: it may be a good idea to register for the domain for up to 10+ years - the pricing to renew in AWS could go up when you next renew, so you could future protect the price and save money by going longer. Just a thought.
- Entered my details - I don’t have much to hide from the registry office, but I will enable privacy protection, so that my contact info is not exposed for everyone
- Reviewed, accepted agreements, verified my email and then completed the order!
- Domain was in the pending status for about 30 mins, but after that it showed as registered:

Recap
- Setup a fresh IAM user in AWS - please don’t use the root/master any more than need be!
- Purchased the domain via Route 53
- Accepted the risk that the domain might cost more than $12.00 to renew in a years time; ok with the trade-off.